
Learn how to install EZ Vent-N-Closure on your roof by following the steps below
Getting Started
EZ Vent-N-Closure can help you on your next roofing project
EZ Vent-N-Closure has simplified the process of ventilating your metal roof. Follow the instructions in the tabs or download the printable instructions below to install EZ Vent-N-Closure.
1
Looking at the Ridge, start from left to right.

2
Slide EZ Vent-N-Closure over the end of Metal Sheet.
3
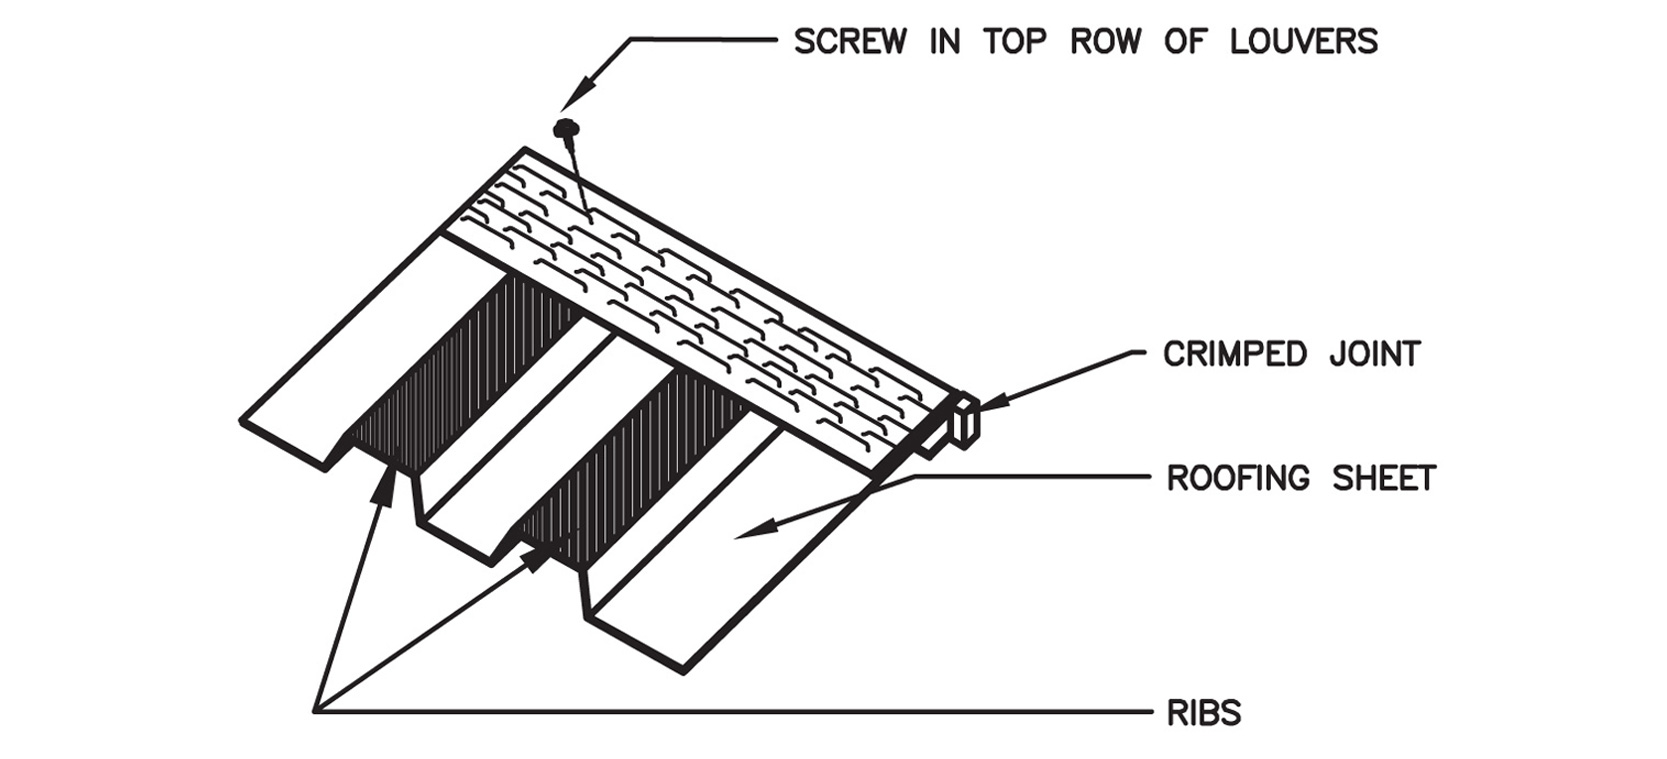
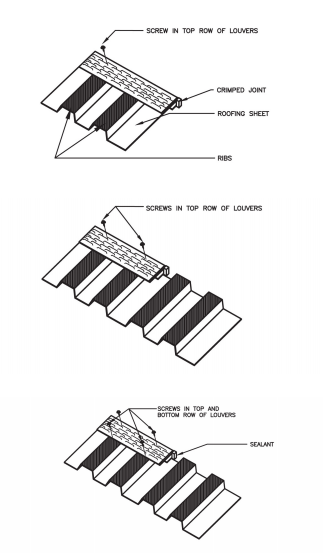
At the left end of EZ Vent-N-Closure, apply enough pressure that the metal sheet embeds a minimum of 1/8” into foam closure. Install 1 screw through vent into rib in the top louver row as shown in Fig. #1 to hold in place. Lap screws will often work for this.
4
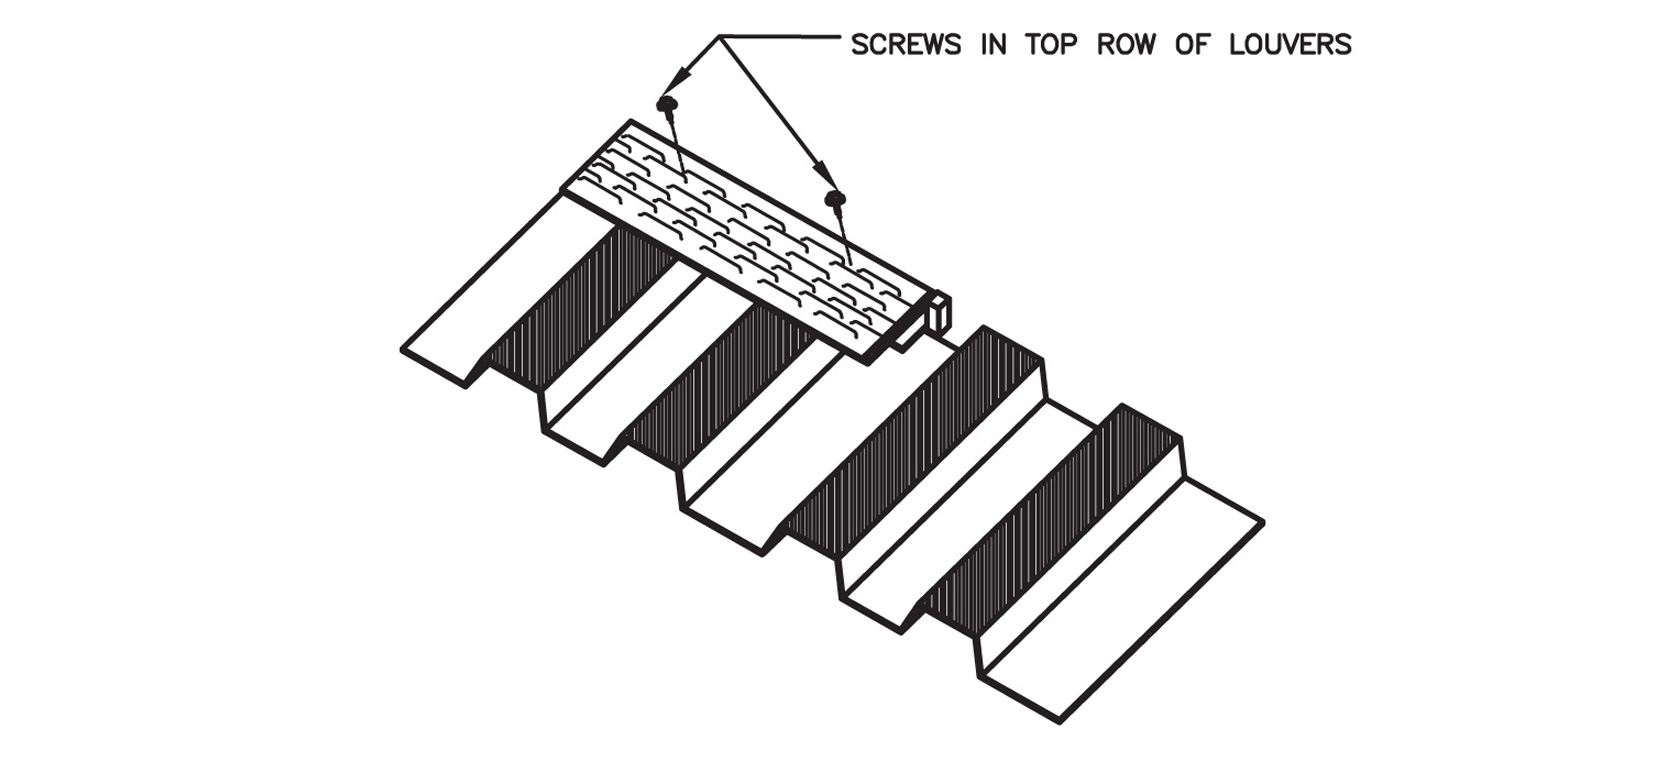
At the right end of EZ Vent-N-Closure apply enough pressure that metal sheet embeds a minimum of 1/8” into foam closure. Install 1 screw through vent into rib in the top louver row as shown in Fig. #2 to hold in place.
5
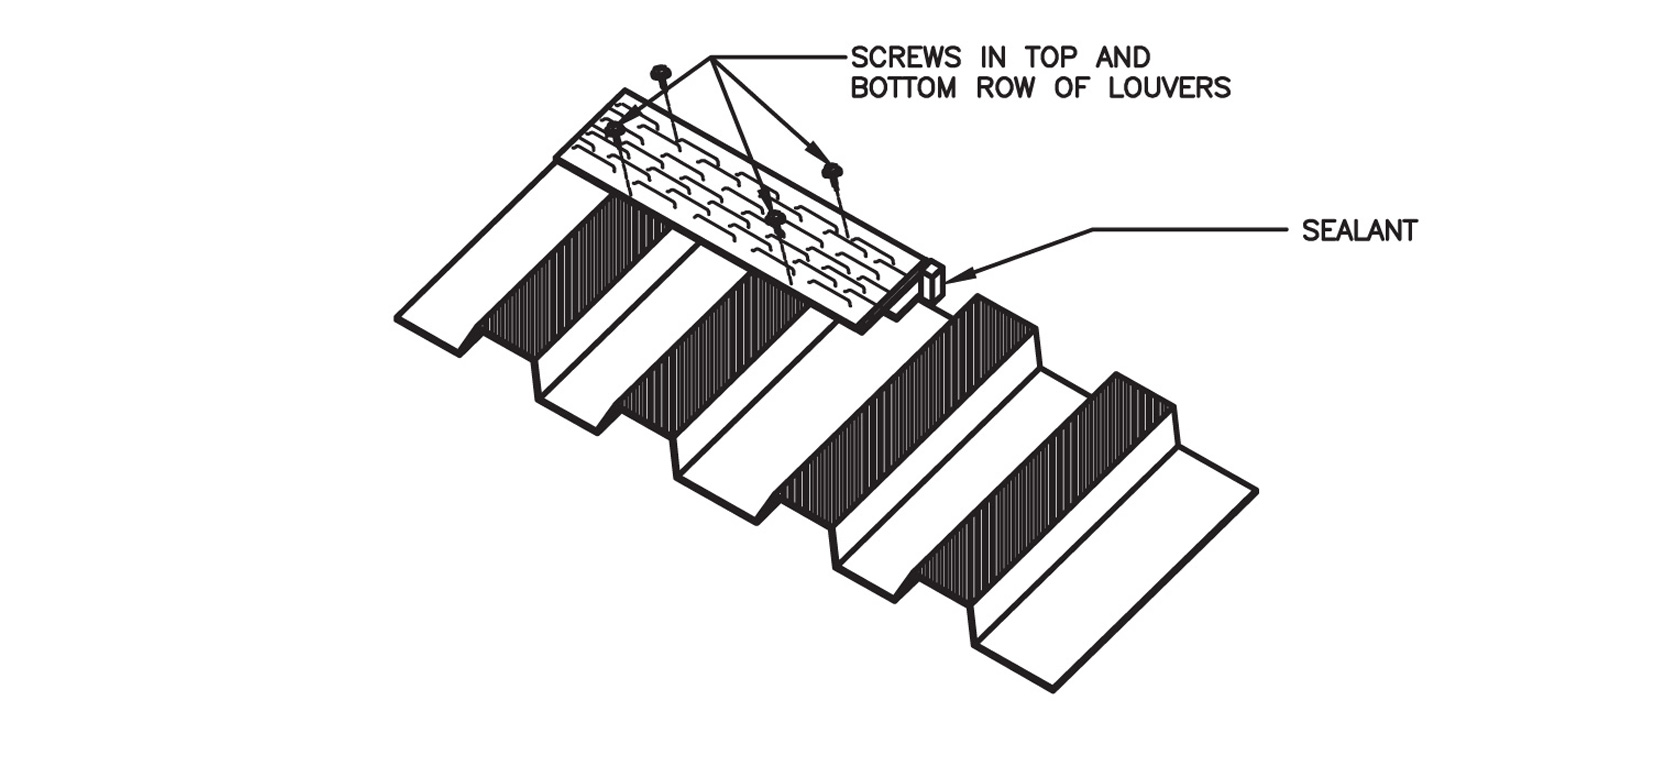
Finish screw placement through vent over all rib locations. Be sure to install screws in upper and lower louver rows as shown in Fig. #3. Install caulk sealant on end of foam seal.
6
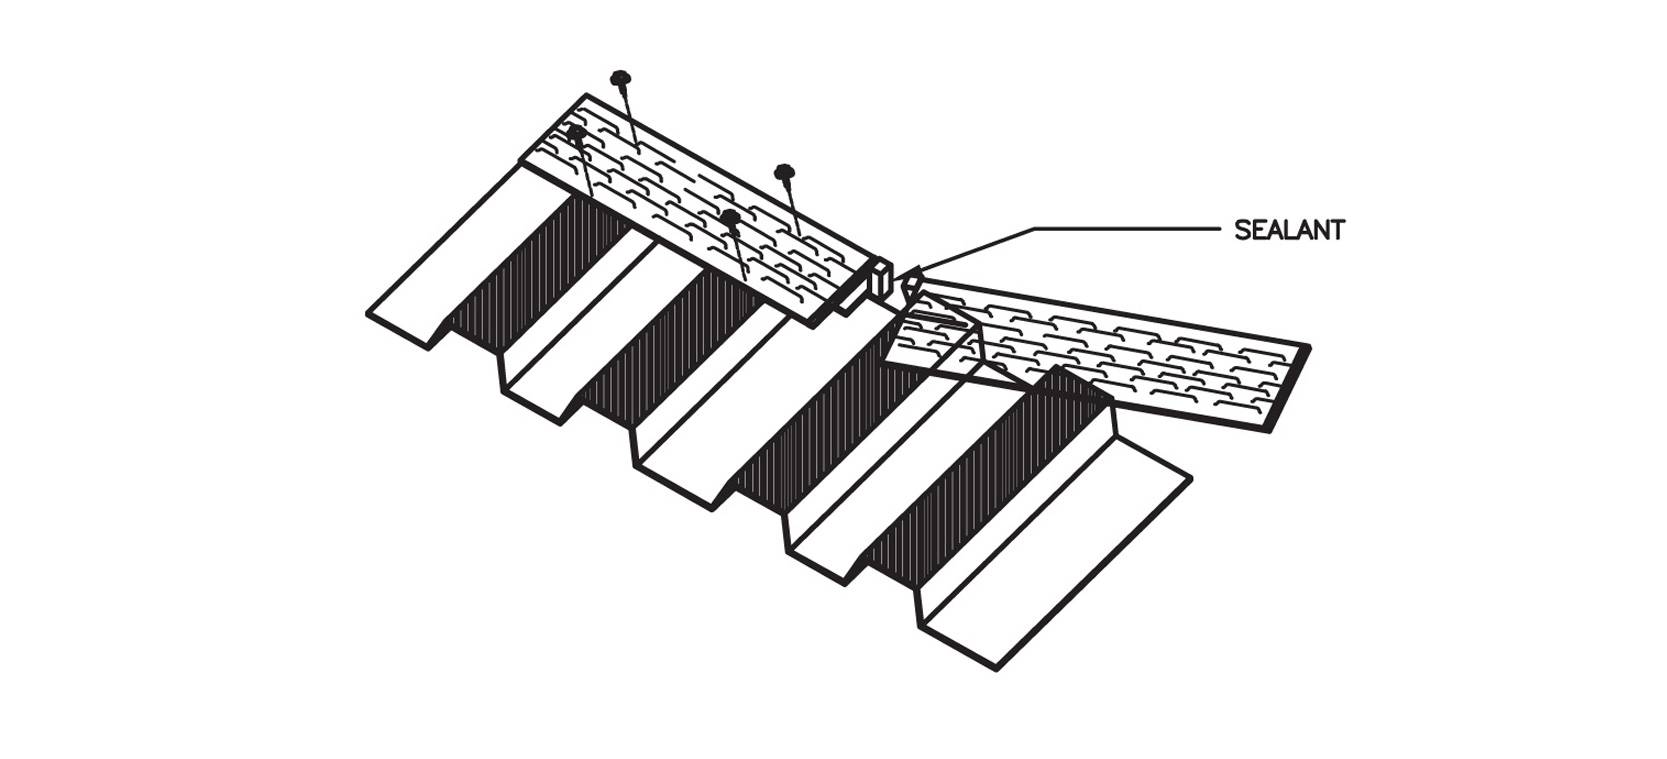
Slide next section of EZ Vent-N-Closure at an angle overlapping 1/2” of swegged end of previous section, making sure the sealant and foam make good contact as shown in Fig. #4.
7
As you fit EZ Vent-N-Closure against the previous section of closure, push the balance of closure against the metal sheet and screw in place as done in STEPS 3 through STEP 5.
8
Continue along ridge, repeating STEPS 3-7.

9
Install ridge cap over EZ Vent-N-Closure as shown below.

Use EZ Vent-N-Closure
on Your Roofing Project
Contact us to find a distributor and get more information about our product
Find a Distributor